
How to Refrigerator Pickle like a Pro
I'm so delighted to have my friend Victoria Swaynos as a guest contributor for this post! Victoria is the current Head Cheese Maker at Bee Tree Farm & Dairy and has over 15 years of experience in the culinary industry. With a background that ranges from making seasonal preserves for a local jam company, running farmers market stalls, coordinating connections between small farmers all across Texas to Central Texas chefs and working in all facets of the cheese industry, let’s just say she always brings the tastiest dishes to the party.
When it’s a kajillion million degrees outside, the absolute last thing I feel like doing is going inside and cooking—I just want something cool and refreshing. That’s why I’m here to bring you a PSA about your quick fix for flavor and delight, the refrigerator pickle!
Why a refrigerator pickle and not a traditional, hot bath or pressure canned pickle? Fridge pickles are easy to put together quickly and come in handy when you find yourself overwhelmed with a prolific crop coming out of your garden like cucumbers or bunching onions. You can always just make them with basic seasonings like peppercorns, hot pepper flakes, and garlic if you don’t have any of the fancier add-ins on hand. A jar of quick fridge pickles is a great gift to bring to a friend’s house or give to a neighbor if you have a surplus. They require no special expertise or equipment to ensure safety, you should just make sure to eat them in the next 8 weeks or so after making them.
My original intention was to give you pickled okra recipes, and I’ll post those at the end. But in case you’ve already wrapped up your okra harvest for the year and are looking to the fall, I want to start with a solid set of guidelines to make a refrigerator pickle for pretty much any pickle-able thing you have. So, gather up those random jars you’ve been hoarding in that awkward cabinet above the refrigerator, and let us rise like pickle phoenixes from the proverbial dumpster fire ashes!
Refrigerator Pickling 101
“Use your imagination when it comes to pickles. I tuck shallots in with cucumbers and a smashed garlic clove. I love thinly sliced pickled onions. I also tuck a hot pepper in with my banana peppers, just to give them a little kick.” –JMJ
When it comes to selecting the fruit or veggies for pickling, remember that you’re essentially going to put these lil’ babes into stasis. You want to use your prettiest, freshest, and most blemish-free specimens. You can preserve them whole (like the okra examples below) or you can cut them down to any ol’ shape you like. Cucumbers can be cut into spears or sliced into rounds. Onions are best cut into thin rounds with a mandolin if you aren’t terrified of them. Otherwise, cut them as thin and as evenly as you can with a kitchen knife.
What produce can I pickle?
What can’t you pickle?! Here are some of my favorite foods to pickle that might be in your garden: Bok Choy, Beets, Carrots, Cucumbers, Cabbage, Okra, Watermelon (rind), Radishes, Turnips, Persimmons, Green Beans, Onions, Broccoli, Brussels Sprouts, Cauliflower, Fennel, Garlic, Kumquats, Strawberries, Blueberries, Figs, and Peaches.

Pickled Carrots? Delicious!
Basic Pickle Brine Recipe
This is a great basic brine to start with and as you pickle more things and get more familiar with the flavors you want to cultivate, you can experiment and develop your own recipes. Don’t forget to write them down so you can recreate them later.
1 cup Vinegar
1 cup Filtered Water
1 Tbsp Salt (non-ionized)
1 tsp - 1 Tbsp Sugar depending on your recipe and preference
Herbs & Spices to taste
Now what you need to know about these basic ingredients:
Sugar. Adding sugar is optional but just a hint helps round out the flavor profile of your brine (start at 1⁄2 tsp and work your way up if you’re worried about overdoing it). If you’re using a sweeter vinegar, such as apple cider, and want to tart pickle, you might be fine without.
Vinegar. As far as vinegars are concerned, white vinegar is a great place to start—it has a fairly neutral flavor so it’ll readily take on whatever herbs and spices you want to throw into the mix. It will also jar up really clear, so you can see those pretty lil veggies winking at you from inside the jar. If a sweet and tangy pickle is your thing, apple cider vinegar got you, Boo. Rice and white balsamic vinegars are also excellent options. While I wouldn’t recommend it for most pickles, red wine vinegar on a dark and sweet pickle, like pickled blueberries or pickled beets, would be pretty swoon-y.
Herbs & Spices. Once you have your brine base of vinegar, water, and salt, where you choose to take that brine is totally up to you. Whole peppercorns, garlic, chiles, mustard seeds, and dill are classic choices, but there are also so many other fun directions to go! If a flavor sounds like it might be tasty paired with your chosen fruit or veg in vinegar, 99% of the time it probably is! Add spices like cumin, coriander, and fennel seed, or even fenugreek, to your pickled onions. Shallots and za’atar in a cauliflower pickle are a-mezze-ing! Daikon pickled with rosemary and thyme? Hubba-hubba!
There are no real rules here. My only advice is to start off with smaller increments of your more intensely flavored herbs and spices (1 tsp or even a 1⁄2 tsp at a time). You can always add more as you cook, but it’s almost impossible to take a flavor away once you go overboard. Keep in mind that any hotness marinating in with your veggies will increase in intensity as time goes on. One work-around for this is to incorporate your spice into the brine itself, tasting it as it cooks. Once you’re happy with the heat level, strain out the spice before jarring. That way, you know your pickle will hit that spice level and go no further. I like to go halfway here and spice my brine, strain it, and then add a fresh pepper to the raw packed veggies. By following that process, I get a warm spice base with a slight increase in kick the longer I let it sit in my fridge.
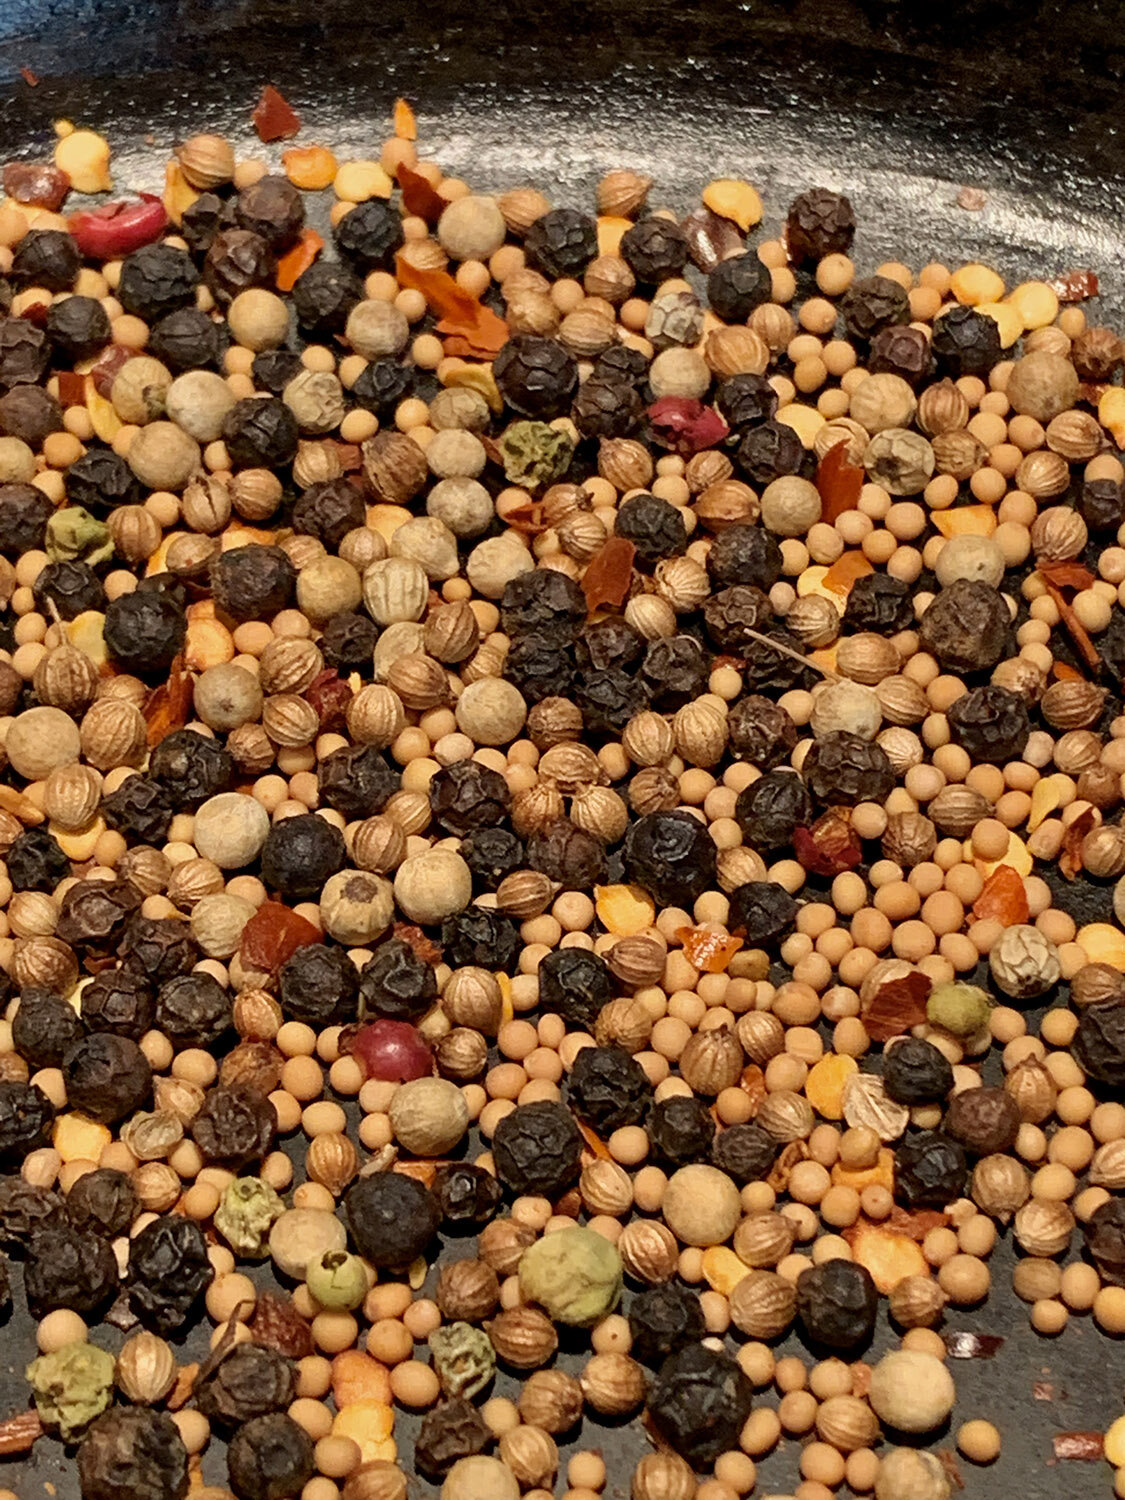
Toasting your spices until they become fragrant really brings out their full flavor potential.
Toast your spices. Some spices really shine their brightest with the addition of a little bit of dry heat. If you’d like to toast your spices (like I do in the sweet & salty okra brine), start with heating up your pan on low heat and gently scoot around your ingredients until they become aromatic. Be careful not to let them burn (this should only take about 3 or 4 minutes). While not wholly necessary, this can help add an extra bit of warmth and depth of flavor into your brine.

JMJ uses a dry erase marker to date her jars.
How much brine will I need? This will really depend on how many veggies you use and how densely packed they are. I find that 2 cups of brine will generally be enough for about 2 pints of pickles, but I always recommend making twice as much brine as you think you’re going to need. Some pickles (such as the okra) will absorb the brine as they sit in the fridge, so having extra brine on hand to ‘top them off’ as needed is super useful. If you end up with extra after everything is jarred and settled, don't worry. Brine is fantastic added to sparkling water for a refresher on a hot day (the ginger spice okra brine is great for this!) and in cocktails. And, not to blow your mind, but subbing pickle brine for the acid in your salad dressing is a total gamechanger. If you don’t have extra brine and you notice that your pickles need a top off, just use regular vinegar, whatever you used for the brine.
Brine Time. A little piece of advice here about cooking your brine. While you’re heating the liquid, avoid the temptation to stand directly over your pot—or lean down and smell it—this is pretty bracing stuff! In fact, it’s a good idea to pop on that vent hood. Your eyes and throat will thank you for the reprieve. Once the salt and sugar are dissolved, your brine is basically done. Want to see if the flavors are to your liking? Put a spoonful of the liquid on a small plate and place it in your freezer for a few seconds to cool. Then try it. If it tastes good, you’re ready to go! Needs a little something else? Layer in more flavors, let it simmer on low for a few minutes and then try it again. Take the time to develop a flavor you really dig. It’ll only take a few extra minutes and you’ll be that much happier with the payoff.
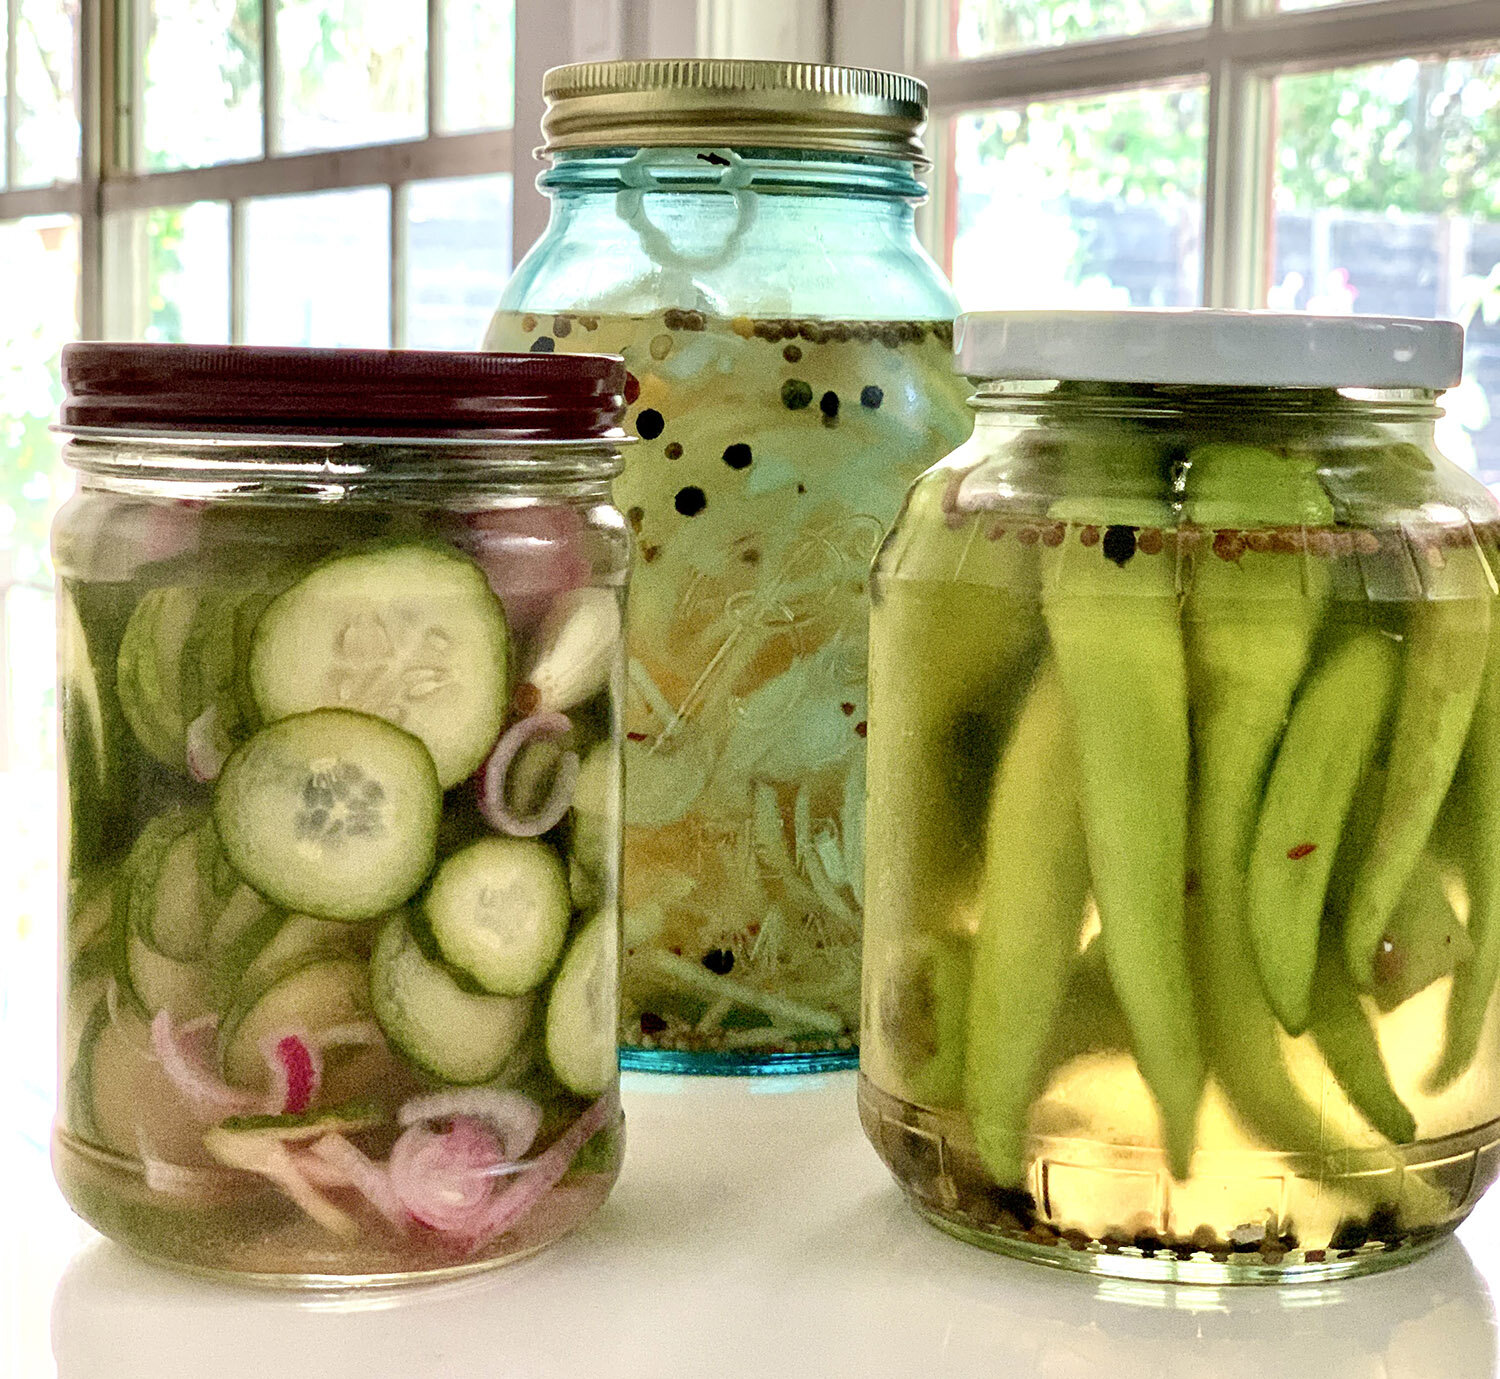
Pack-a-Pickle Party. I’m a big fan of a crisp pickle, so I almost always raw-pack my veggies. That means once you’ve rinsed and prepped your produce, shove them straight into the jar and add the brine on top. If you prefer a softer pickle or are working with something particularly dense, you can cook them briefly in the brine or blanche them before jarring. When it comes to filling the jars, pack those suckers FULL. I always have a mishmash of different sized jars around and find it super helpful to use whatever fits the given produce (like a large skinny jar for the tall okra or a small squat one for smaller and/or cut veggies). Layer your produce tightly into the jars. It can sometimes be awkward to get it all to fit, so start on the outside edge and working your way into the center. Any extra spices you want to be visible from the outside of the jar (like a bay leaf or garlic) you can then wiggle down between the produce and the glass. If you want to add additional dry spices, just sprinkle them on top once the veggies are in, or put them in the empty jar before packing. This can be the most time-consuming part of the process, but don’t let it stress you out! Your goal is to ensure is that everything is packed together tightly enough that the whole shebang won’t bob out of the brine the moment your back is turned. This is much more likely to happen with certain fruits and veggies (pickled okra, for instance, will invariably float up like little balloon-y jerks). But don’t worry, just keep them as covered in brine as possible. Using a jar with ‘shoulders’ as opposed to a wide mouth jar is one good way to help keep them down. Don’t forget to tuck in your herbs and spices in the brine with your produce!
Some like it hot… I generally like to add my brine to the jars while it’s still warm but not boiling. That being said, if you’re pickling a food that’s fairly dense, adding it straight off the boil will help those tough guys relax into their new pickle form a little easier. If you’re pickling something more delicate, like blueberries or thinly sliced onions, let the brine cool to almost room temperature so you don’t heat shock the little tender darlings.
Make ‘em purty. As you’re filling your jars, remember to make them look nice. You’re preserving some of the stunners of your garden at the height of their loveliness—show them off! Will adding those two thinly sliced jalapenos to the side of your jar of pickled carrots so that the stems are ever-so-close to touching, like a miniature brine-soaked version of Michelangelo’s ‘Creation of Adam,’ make it taste better? Probably not. Will it make you smile every single time you open the fridge? Yes. Yes, it will.
Give ‘em a whirl. After you’ve brined your pickles, carefully take a chopstick, or small spoon, and wiggle it around inside the jar to break apart any trapped air bubbles. Let the pickles cool to room temperature (about 30 minutes or so) before popping on the lid and storing in the refrigerator. Be careful not to close the lid too tightly, the produce will ferment a little as it relaxes and will release some gasses. As long as the lid isn't too tight, these gasses will just slowly seep out.
How long do I wait? I highly recommend you give your pickle pals a minimum of 48 hours to do their thing before you dig in. Onions can be enjoyed within a few hours as they are so thin and take on flavor quickly. Your pickles will continue to pickle and flavor as they sit, so if they seem a little too firm or ‘meh’ give them a few more days to perk up. For heartier veggies like okra, I wait at least 5 days for the small, pinkie-sized ones and about 10 to 15 days for the big beefy guys. Anything you pickle should stay fresh for about two months after its birthday and, depending on your fridge, may keep even a wee bit longer but obviously, that’s not a scientific measurement so try to eat them within 8 weeks as “refrigerator pickles” are a quick pickling method and not meant for longevity.
What do I do with these things? Pickles are a delicious and healthy snack, especially on a hot day. If a solo pickle isn’t your thing, they’re a great addition to any dish in need of a crunch factor (sandwiches! tacos! salads!) and are best buds with every cheese and charcuterie board that will come their way. They also make excellent cocktail garnishes.
Still need some inspiration? Read on for two takes on pickled okra.
Pickled Okra: Two Ways

Use your prettiest okra. Your youngest, softest okra. Nothing too mature or tough.
As I mentioned earlier, you’re only going to want to use pretty produce for this. You’re basically preserving whatever you have today in its current state, so you’ll want the vegetables to look and feel as lovely as possible. Set aside any okra with blemishes or soft spots and use those for cooking instead. Do not use any okra that has grown past it’s prime and gotten too large. Overly mature okra is not edible. It gets too hard to bite and pickling won’t make it softer.
Prep the Okra: Rinse and thoroughly dry the okra. You don’t want it to get soggy while you’re cooking the brine. Furthermore, any extra time sitting in water can increase the slime factor for okra and, while that is great for cooking, no one wants a slimy pickle.

Got Prickles? Depending on the varietal and time of harvest, your okra might be fairly spikey. You’ll want to remove these prior to pickling. Prickly okra can be itchy buggers to handle, so I recommend wearing disposable gloves to save your hands. If your okra’s pretty smooth, a quick run under the faucet and a little rub down with a veg brush or paper towel might do the trick. If not, do the following:
1. Take a plate or shallow bowl and pour a small pile of salt (about 1 cup will do) in the center. A coarse salt is best, but really whatever you have on hand will work. One at a time, toss in your okra and give them a good scrub down in the salt until it feels like most of the spikes have been removed. Then place it in a colander to be rinsed one final time. You might need to replace or add to salt as you go, depending on how much okra you’re working with and if it’s a veritable Spike City. I like to set this up like a little assembly line. Bowel of spikey okra, salt scrub plate, colander of okra to be rinsed.
2. Once you’ve given the lot its okra exfoliation, rinse them thoroughly checking for any stray spikes (I find that the little baby okras tend to need a second run through sometimes).
3. Once the okra is free of its prickles, rinse and pat dry.
Hats off! I like to trim off the little cap at the stem end of the okra, being careful not to slice into the pod. This isn’t necessary, but it makes them look a little nicer, allows them to fit that much easier into the jars. Since the little stem ends can be too tough to eat sometimes, this also makes it that much easier to just pop the whole thing in your mouth when it’s done.
Pack your jars. Take your freshly cleaned jars and get fillin’. Okra can be a bit awkward to fit, so I suggest starting on the outside edge alternating stem point up and stem pointing down, working your way into the center of the jar. Any extra spices you want to be visible from the outside of the jar (like a bay leaf or garlic) can then be wiggled down between the okra and the glass. If you want to add more dry spices, sprinkle them on top once the veggies are in or put in the empty jar before packing.
Now that the okra is prepped and drying, it’s a great time to start on your brine. I’ve written two options here, but feel free to experiment and come up with your own.

Sweet and Salty Okra Pickle Brine
1 cup White Vinegar 1 cup Water
1⁄4 cup Salt
1⁄4 cup Sugar
2 tsp Mustard Seeds
2 tsp Coriander Seeds
1 tsp Black Pepper
1 tsp Red Chile Pepper Flakes
2 Bay Leaves
6 Chile Pequin (or 1⁄2 a small Jalapeno)
On low heat, toast the mustard seeds, coriander seeds and black pepper until fragrant (about 3 to 4 minutes). Remove pan from heat and allow to cool slightly. Once cooled, add the vinegar, water, salt, and sugar to the toasted spices. Return to a medium-high heat and bring to a boil until all salt and sugar have dissolved (about three minutes). Add the chile pequin and bay leaves to your raw-packed okra. Allow the brine to cool slightly and pour over raw-packed okra.
Ginger Spice Okra Pickle Brine
1 cup Apple Cider Vinegar
1 cup Water
4 tsp Salt
½ cup Sugar
¼ cup Candied Ginger, minced
1 T Fresh Ginger, minced
3 tsp Red Chili Flakes
1 tsp Allspice
½ tsp Whole Peppercorns
Combine all ingredients in a small saucepan over medium-high heat, stirring occasionally until all the salt and sugar have dissolved (approximately three minutes). Allow to cool slightly and pour over raw-packed okra.

Now that’s some beautiful brine!